zaterdag 29 december 2012

Blok 1 (2nd school year)

I survived the re-exam and continued to the second year of Spatial Design. Already Blok 1 has ended. 

AKO
Artistieke ontwikkeling: Kennis en Ontwerp - Artistic development: Knowledge and Design
Assignment: create a box with an object inside it. By making a lot of models out of abstract forms, you will experiment with composition. 


TKO
Technische ontwikkeling: Kennis en Ontwerp - Technical development: Knowledge and Design
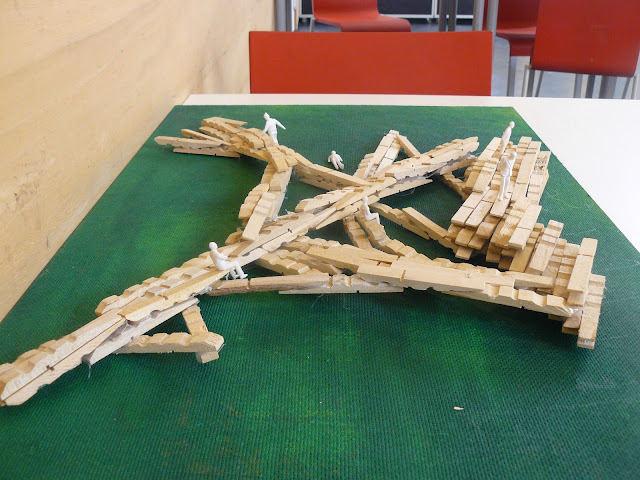
Assignment: create a tower out of beams for placing billboards. Take in account the vector active structures. 


ABO
Algemene Beeldende Ontwikkeling - General Expressive Development
Assignment: create a fence. 


PRO
Project
Assignment: rebuild a dutch "transformatorhuis" (size: 3x5x4m) into a house for a single person. The theme of this project is functionality. A "transformatorhuis" is a small (power) house where electricity current is ended. 


vrijdag 23 november 2012

Re-exam

At the end of the last blok, the teachers told me that my work is still too flat. I was lacking three dimensionality and they gave me an extra assignment in which I had to prove that I can work more in space instead of surfaces.

Assignment: create 10 models or sculptures on account of a news item.

Initially I wanted to make models in relation with the newly built EYE Film Museum in Amsterdam because of its intriguing architecture.


EYE Film Museum, Amsterdam


But I could not easily find an article, so I did my assignment about the exposition that was held at the EYE at that time. The work and life of director Stanley Kubrick were displayed at the exposition. By watching his movies and reading books about the productions I got inspired to create the following models/sculptures.


Sculpture 1 "Anxious", inspired by "Lolita"

Sculpture 2 "Spacious", inspired by "2001: Space Odyssey"

Sculpture 3 "Uneven Triangles", inspired by "2001: Space Odyssey"

Sculpture 4 "Thick Walls", inspired by "The Shining"

Sculpture 5 "Transparancy"

Sculpture 6 "Transparant Uneven Triangles"

Sculpture 7 "Irregular Shapes"

Sculpture 8 "Floating Roof"

Sculpture 9 "Linear and urved Shapes"

maandag 4 juni 2012

Blok 4 (second & last blok of Spatial Design)

AKO
Artistieke ontwikkeling: Kennis en Ontwerp - Artistic development: Knowledge and Design
Assignment: Create a ceramic sitting element with a maximum weight of 25kg by using a molding technique.

in mould poured concrete
Sitting element

TKO
Technische ontwikkeling: Kennis en Ontwerp - Technical development: Knowledge and Design
Assignment: design a double curved roofing that covers a surface of 1m x 1m.

Double curved roofing

ATV
Artistieke ontwikkeling: Techniek en Vaardigheid - Artistic development: Technic and Skill
Assignment: make your own portfolio by using the Adobe software InDesign.
This subject was meant to learn how to work with InDesign.


TTV
Technische ontwikkeling: Techniek en Vaardigheid - Technical development: Technic and Skill
Assignment: make 3 detailed drawings of a project using the technical drawing software AutoCad.
This subject was meant to learn how to work with AutoCad.

AutoCad drawings in cooperation with two classmates

PJO
Project oefening - Project exercise
Assignment: choose an archtype and interview 20 persons. Visualise the results of the interviews in accordance with the archtype. Categorise the 20 people in 3-4-groups and find them a suitable location. Transform the archtype for these persons and for that location.

Archtypes

PRO
Project
Assignment: rearrange the passage between the Van Gogh Museum and the Stedelijkmuseum in Amsterdam. 
Take in account the functions of the two musea in the future and the rest of the Museum square. The passage needs to be a clear entrance and the identity and stayingquality must become better. 

To escape the crowd and enjoy the spatiousness of the passage, I came up with the idea of a bridge that brings you to a higher level and lets you feel the rest and quietness of the trees.

Bridge ending at Museumplein 1
Bridge beginning
Bridge ending at Museumplein 2


woensdag 28 maart 2012

Progress feb - mar 2012: Blok 3

What did I learn during Blok 3 at the Spatial Design department?

AKO: it is good to experiment a lot, but when making the final product, try to break out of the sketchlike working method and put more time and attention in it.

PRO: during a presentation, trying too much to undermine your nerves can result in presentating as if you're uninterested and bored. 
Even when in a researching stadium, try to think of a lot of different concepts and make a lot of sketchy 3D models. It will improve the development of your concepts for the project.

PJO: when having done research, do not leave the results and conclusions for what they are, but try to combine them in your following concept.

TTV: working with software looks easy and quick, but once you get into it, time flies without noticing it.

dinsdag 27 maart 2012

Blok 3 (first blok at Spatial Design!)

After a succesfully enclosed first Schouw, I switched from Product Design to Spatial Design.
Now time has proceeded and Blok 3 already has ended along with my first Beoordeling at the Spatial department. I passed all my subjects (as far as I know, the results are not official yet). Here are some pictures.

AKO
Artistieke ontwikkeling: Kennis en Ontwerp - Artistic development: Knowledge and Design
Assignment: create two boxes. One for looking at it and one for feeling it. Use natural materials and synthetic materials. The theme of each box must the oppocite of the other.
[pictures must be uploaded yet]

ATV
Artistieke ontwikkeling: Techniek en Vaardigheid - Artistic development: Technic and Skill
Assignment: make mold for pouring concrete. The mold has to be 2m high.

LEGO man

LEGO leg

LEGO head

LEGO man 2

PRO
Project
Assignment: research an archetypic room and design an ultimate room.

Elemental Bedroom concept
 The four elements water, earth, fire and air must be experienced in the bedroom. This concept is meant to give inner calmness by creating rituals that organise and stabilize life. Examples of expressing the elements: walking through water, odours of plants, filtered light.

Elemental Bedroom first design

Elemental Bedroom first design
 The brown area's are the floors of the bedroom. The bushes and the off-white surface are walls. The whole room has the shape of a quarter of a circle and has a quarter of a dome as third wall and roof.

Elementaal Bedroom final design
Elemental Bedroom final design
The quarter of a circle has changed into a whole circle with a whole dome on top of it. The bedroom is also connected to the bathroom (same construction) which is halve a floor downstairs. Highlights: some plants growing from the dome create mood by filtering light and the relaxing sound of water falling from the bedroom into the bathroom.

 
PJO
Project oefening - Project exercise
Assignment: research the amount of times of (an object in) a place and create a 3-dimensional reproduction of the gathered information.


TKO
Technische ontwikkeling: Kennis en Ontwerp - Technical development: Knowledge and Design
Assignment: create a light element. It has to be made out of synthetic sheet material. It has to hang from two points. It has to be made out of a monoclastic form.


Mr. Armu

My light element is called Mr. Armu because it reminds me of an armadillo.


TTV
Technische ontwikkeling: Techniek en Vaardigheid - Technical development: Technic and Skill
Assignment: make in the Adobe software Illustrator a plan/map to use in your PRO assignment. (pictures are presented onder the subject PRO).

zaterdag 24 maart 2012

Switch

Two months ago I switched my Product Design study to Spatial Design. It's not that I wasn't happy at the Product department but it I felt a little too free in what to make and that freedom was actually binding me into unknowness. The Spatial department focuses on urban and interior design and thus will always have a direction (goal) to work to, it is something you need to keep in mind. A more direct guideline is what I needed (though sometimes the study itself can be very autonomous). The best thing I noticed is that in both studies you are allowed to research, experiment and design anything you like.
The switch was not hard at all because the content is quite the same: both are very spacious oriented (as in 3 dimensional) so they have a lot in common in they way you need to think and design.

The only thing I miss are the friends I made at the Product department. Since there only are around 30 people, we got very close. The Spatial department has over 60 students so it's hard to get to know everyone. Also because the groups are formed already. But now I have found friends in all groups and in different classes.

dinsdag 31 januari 2012

Seminar Photoshop & Indesign

My last week of the seminar month will be occupied with learning to work with Photoshop. At school the Macs are installed with Adobe Photoshop CS5; pretty fancy stuff.
We will also concentrate on the software called Indesign which is used by professionals who edit magazines, newspapers, etc.

In just two days we've already mastered a few skills and tools. It's fun to work with layers, brightness/contrast, transform and the magic wand. But it is also difficult.

At day 1 we got explanation of how to make pictures free of the environment and to use layers. The picture below shows that I can free two people from a coloured setting and place them in a new background.


Kendoka's meet Rome

Day 2 we had to experiment with the layers and set our previously made products in a new setting. It's hard to create a truthworthy image since the all the pictures have a different kind of lighting and perspective.
Afterwards I noticed that a setting with water can make it difficult to place objects in it, since it would not look realistic...


My Products in a Japanese Garden

The 3rd day for the first time in my life I opened the  programme Indesign to  play with the layout of a document. How to make columns, frame pictures with text, changing the background colours, etc. Sine I am used to the Word software, it was a little hard to control the new shortcutkeys on a Mac.


Classmate Clones

vrijdag 27 januari 2012

Seminar Ceramics

The first month of the new year brings us 4 weeks of seminars. These seminars are about technical and theoretical improvement and they give us the opportunity to try something that is not in our subject package. Since this is a collaboration program between teachers of all departments, students from all departments can participate together in mixed classes. A few examples of the offered seminars for the 1st year students of the Product Design department are: pouring synthetic or plastic materials, bending metal, making a short animated movie, photoshop course, binding books, making paint from pigments, clay, ceramics.

Ceramics is a nice 3D exorcise and since making a reservation for using the ovens at school takes at least one month, I figured it would be nice to try something of which I would probably not take the initiative of doing it. The seminar ceramics started at the second week and it has ended at the end of the third week (yesterday).

The assignment we got was: make a sculpture of a (part of a) fruit or vegetable and add a contrasting form to it. Minimun size: 60 x 60 x 40 cm. Get inspiration of your studying department (in my case Product Design) and/or background/roots. Rough Chamotte Clay weight and cost: 1 pack = 10kg = 10 euro's.
The teacher explained to us that actually everything can be a contrasting form, but she said there were good ones and bad ones. The bad ones don't have any relationship between ech other and don't look interesting or funny. The good ones instead activate you to think about the relationship between the (two) forms and can sometimes even be ridiculous or bizarre. But opinions can differ always...
Another important thing: we had to build our fruits or vegies  as if it was an architectural building. The other teacher (there were two) learned us how to make supporting beams like archs and flying buttresses. Using this method the sculptures wouldn't get too heavy and easier to transport.


Oxheart Cabbage

Construction side 1

Construction 1

Construction side 2

Relief of Oxheart Cabbage

Almost finished Oxheart Cabbage

Finished Oxheart Cabbage front

Finished Oxheart Cabbage back


Finally my Oxheart Cabbage bacame 30 x 50 x 80 cm, needed 4 packs of clay and weighted 40kg.
At the end of the assignment it appeared that the teacher wanted us to make the whole fruit or vegetable and add a cliche contrasting form to it, which was a little disappointing.
But altogether it was a very exciting seminar where we learned how to treat and dry the clay.